

In this tutorial you will learn how to render an abstract 3D model from 3DSMax and then make it pop in Photoshop. Adobe Photoshop CS4 and 3DS Max version 9.0 are used in this tutorial
but you can use other versions if you have not upgraded.
Step 1
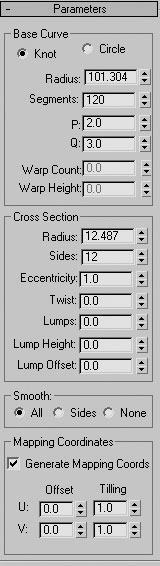
Open up 3DSMAX 9.0. You can use other 3D programs, however, it will be a lot easier to follow this tutorial using the program we are using… If you would like to skip over all the 3D stuff you can download the 3D file here and go to Step 10. Start out by creating a Torus Knot by going to Create > Extended Primitives > Torus. Click and drag in the front view. Change the parameters in the panel to the following:

Step 2
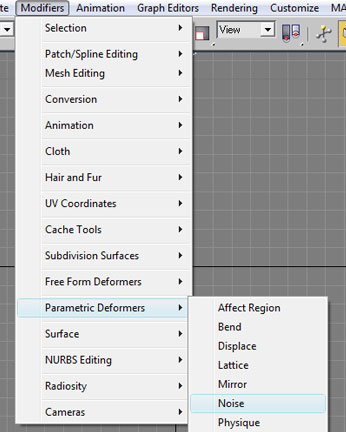
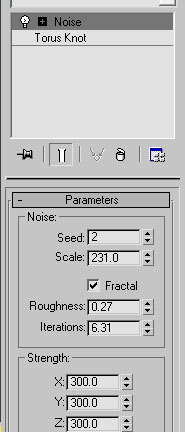
Now add a Noise modifier to the Torus Knot by going to Modifiers > Parametric Deformers > Noise. Change the parameters of Noise to the settings in the image below:
Step 3
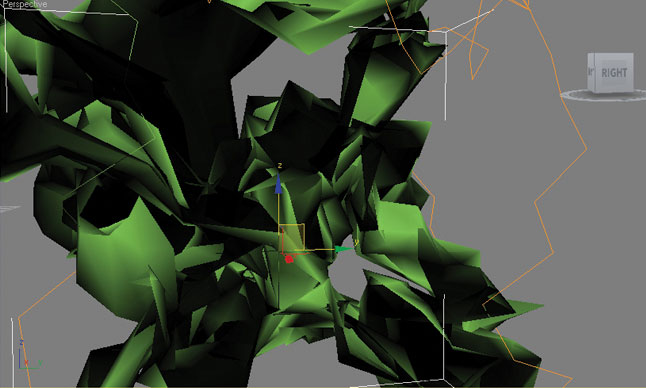
In the Perspective viewport change the positioning to how you like it. Use the following image for reference:
Step 4
Now lets make the material. Open up the Material Editor by pressing M on the keyboard or Render > Material Editor. Then click on button labeled Standard and choose Architectural. Change the material to the following:

Step 5
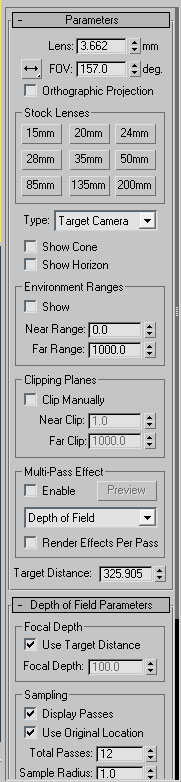
Create a camera by going to Create > Cameras > Create camera from view (or CTRL+C). Change the parameters of the camera to your liking. I choose to have a distorted look by changing the lens to a lower focal length 3.662mm. You can change your settings to reflect mine. If your camera look isnt distored the way you like, you will need to push the camera closer to your object. This will change the look dramatically. Move the camera in the top view watching it in the Camera01 view port.
Step 5
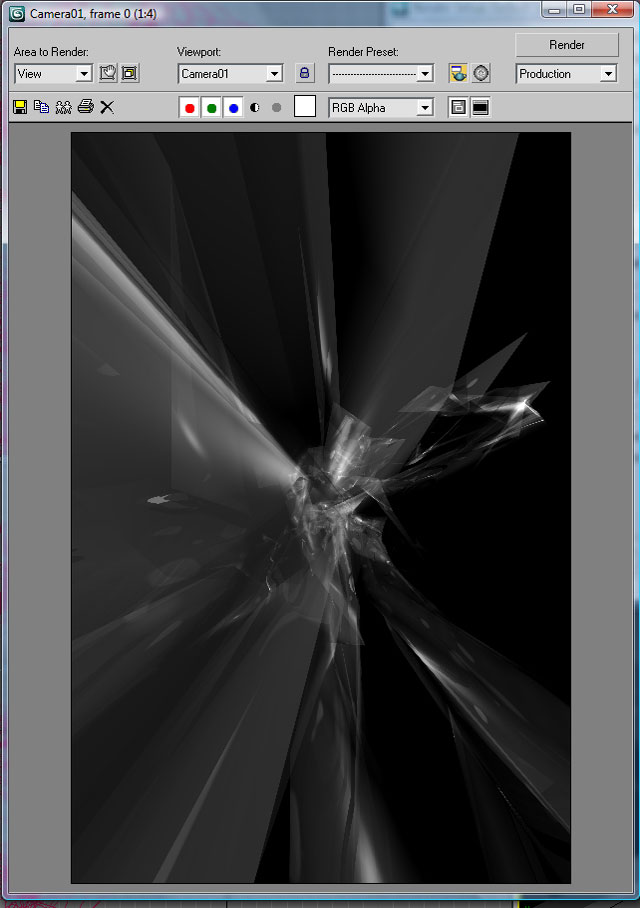
Go to Rendering > Render Setup (or press F10) Change the Width and Height to 3000 x 2000. Then press Render. After it is done rendering, press the save button and save the file as a TIF image (.tif) with an alpha channel. Now render out some other views to use later.
Step 6
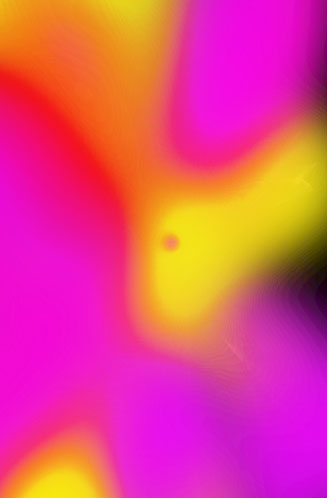
Now time to jump into Photoshop. Open your your first render and name it Render. Add a new layer and name it Render-Color. With the Brush tool pick some colors out and start to paint along the lines of the render. Experiment with changing the flow,opacity and size of the brush. This is what it should look like so far:
Step 7
Now go to Blur > Gaussian Blur. Change the amount to 198 Pixels and click OK. Change the Layer Style of the Color-Render layer to Overlay.

Step 8
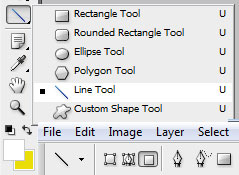
Spice it up time! Create a new layer and name it Lines. Change the foreground color to white. Click on the Line tool. You might have to click and hold on the shapes tools to bring up the pop out window. Finally, change the Line options toolbar to Fill Pixels.
Step 9
Drag the lines tool on the canvas in places that your render ends or needs a little spicing up.

Step 10
To make the lines not look so abrupt. go to Filter > Blur > Gaussian Blur. Change the blur level to 13.0 Pixels and click OK. Change the layer style to overlay.

Step 11
Download the font Oktober by Alen Stojanac from DAFont Type the words escape2012 and put the text layer in the upper left. Set the layer style to overlay.

Step 12
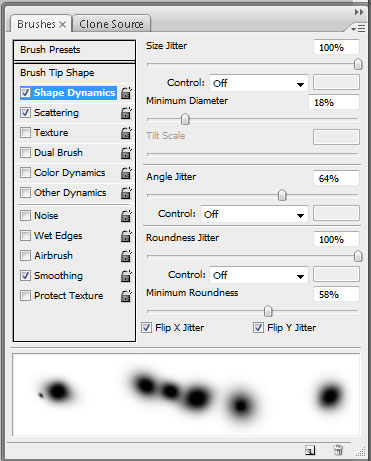
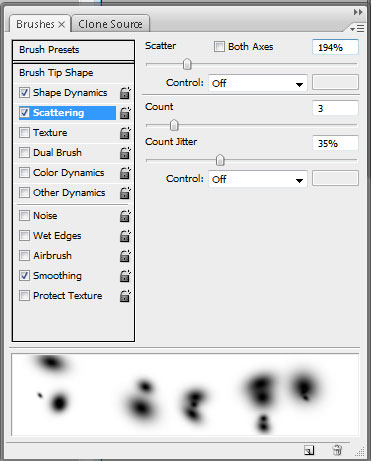
Create a new layer called fairy dust. Open the brushes pallet (Windows > Brushes). Choose a soft 100 pixel brush. Click on Brush tip shape and change the Spacing to 200%. Cick on Shape Dynamics and Scattering. Follow the settings below:
Step 13
Using a white brush, start to randomly paint outwards. Change the layer style to Overlay. Make sure your flow and opacity are set to 100%
. 
Step 14
Open the Lineart Illustrator files that where included in the zip file. Place them anywhere you think fit. Experiment with the layer styles and Effects. Here is the final version:


I found http://www.mediamilitia.com very informative. The article is professionally written and I feel like the author knows the subject very well. http://www.mediamilitia.com keep it that way.
http://img33.imageshack.us/img33/1445/santaslave3ds.jpg
My outcome.
Pretty awesome I think for my first try, but oh well. I’m a newbie to 3ds Max anyway lol
Thanks much for that nice post.
really good step – by – step tutorial . thanks.
Thanks for this awesome post
awesome tutorial… added
Great combination. thanks for sharing.
good tutorial, thanks for sharing
thanks tutorial. but links broken for download! pls check!
Fixed. Thank you for letting me know.
That’s great! keep it up!
Awesome work. Thanks for the tutorial. I’m trying to find out how to do the 3D part using Photoshop CS6 3D features.