
Today we will be looking at how to go about creating a image with a electrifying, capturing feel. I will show you how to use simple colors and basic Photoshop effects to create an intensifying image that will certainly make your friends jealous. Download the resources located below and let’s get started with the large piece.
Stocks: Young Disk Jockey | Traffic | Warehouse by Thomas Boulvin
Brushes: Cosmic Light Brushes
Textures: 47 High Res Light Streaks by Barton Damer | (Alternate Link)
Displacement Map Files
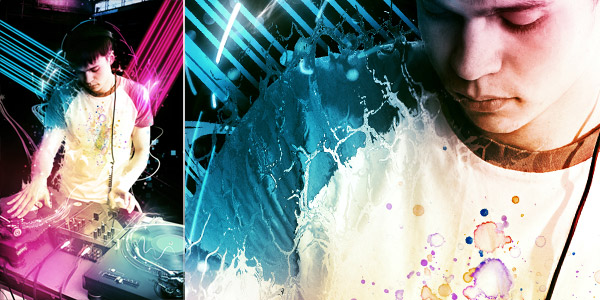
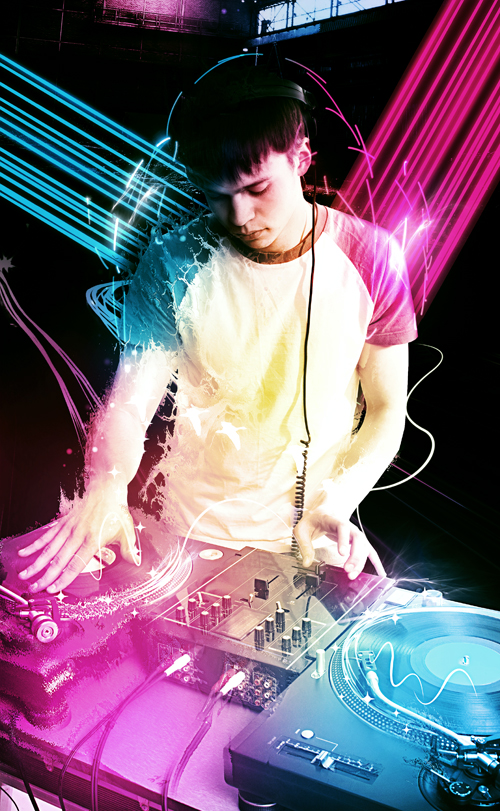
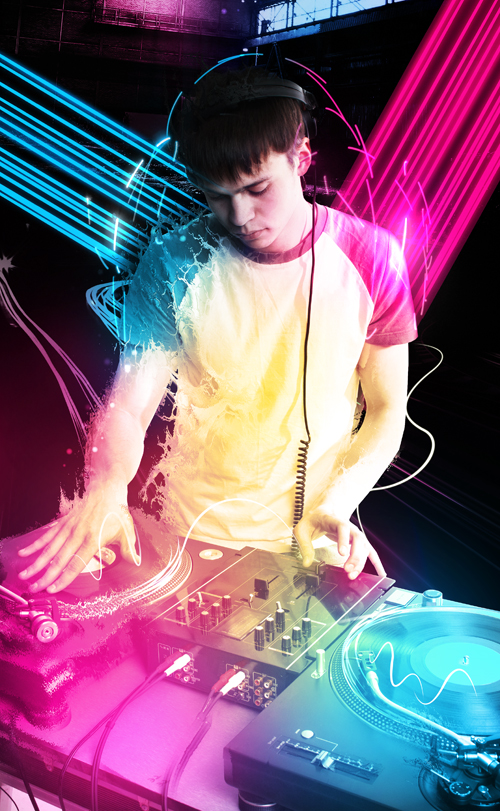
Final Image Preview
Step 1
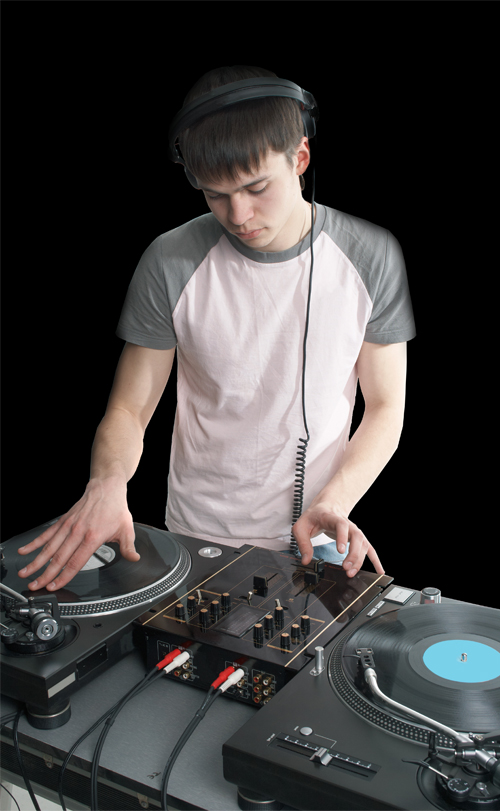
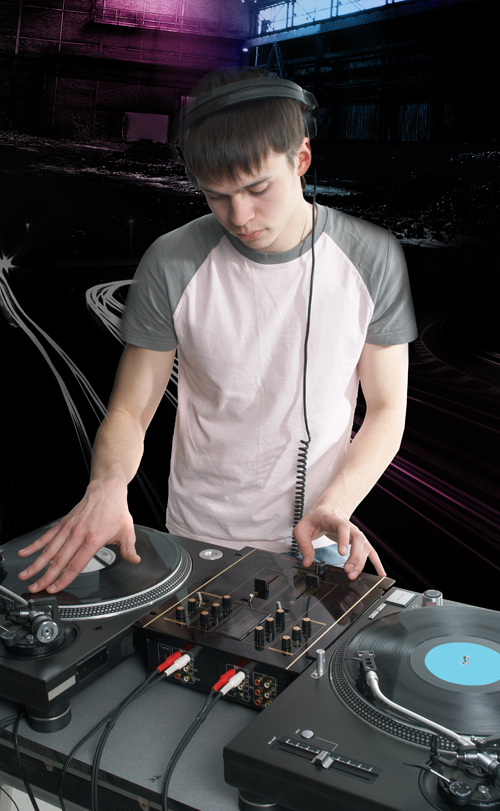
You should have Photoshop open by now, it’s time to open up your stock image in Photoshop and then use the pen tool or eraser brush to remove the background from your stock image. If you don’t know how to remove the background, please do follow Media Militia’s Tutorial on it – An In Depth Look Into Background Extraction Techniques. Once you have removed the background you should have something like this below. Remember to fill your bottom layer with black #000000
Step 2
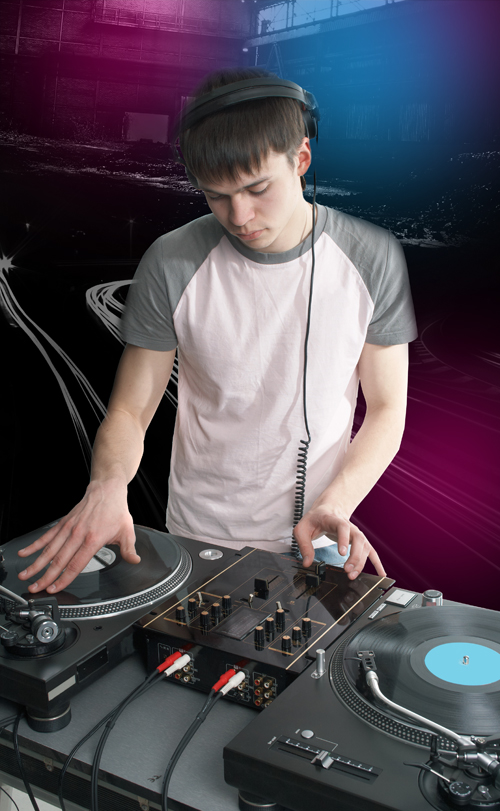
Now that we have a extracted stock image in our canvas, it’s time to start putting together the background. Firstly open up the Traffic image that you downloaded from the resources above. Now insert it into your canvas and place it beneath your extracted stock image. Position it where you want it and then go to Image>Adjustments>Desaturate now drop the opacity down to 60% and erase the parts that you don’t want or like. Now insert the Warehouse by Thomas Boulvin image into your canvas and position it at the top of your canvas, go to Image>Adjustments>Desaturate and drop the opacity down to 75% erase the parts that you don’t want. You should have something like this.

Step 3
Now we have to give our background some color, so create a new layer by going to Layer>New>Layer and then grab your brush tool and with a 960px soft brush make three different spots, two of the spots will be pink #ec008c and the top right spot will be blue #00aeef when you are satisfied with your color placement, change the Blending mode of the layer to Color. Check below:
Normal Blending Mode
Color Blending Mode
Step 4
Now we are going to create skew lines to use as some color attraction points. Grab your Pen tool and draw a straight line across the canvas. Make sure at the top toolbar that paths are selected and not shape layers. Now grab your brush tool and set the size down to 15px hard brush. Now go back to your pen tool and right-click on the canvas and select Stroke Path. Make sure brush is selected in the drop down menu and Simulate Pressure is unchecked and hit OK. Now duplicate this layer a few times by hitting Ctrl + J or right clicking on the layer and selecting Duplicate layer. Make sure that you move each newly duplicated layer up a bit so that they are a few pixels apart from each other.
When you are satisfied with the amount and the spacing select all the line layers and hit Ctrl + E or right click Merge. This will merge all the layers into a single layer, which will make it easier for editing and moving around. Now right-click on the layer and go into blending options. Choose Color Overlay and pick Blue #00bdff. Now hit Ok and Ok again. Now with your lines layer selected, Hit CTRL+T or go to Edit>Free Transform and then tilt the lines in a 20 degree angle and then hit Enter. I Then duplicated the Extracted Stock Image layer and moved it above the lines layer and then erased a bit of the lines layer. This is what it looks like below.

Now duplicate the lines layer and change the Blue Color to Pink #ff0097 and then go to Edit>Free Transform and then right-click within the bounding boxes and hit Flip Horizontal. Now position the lines as needed and maybe change the angle a bit too. Erase the parts that you don’t like. You should have this below.

Step 5
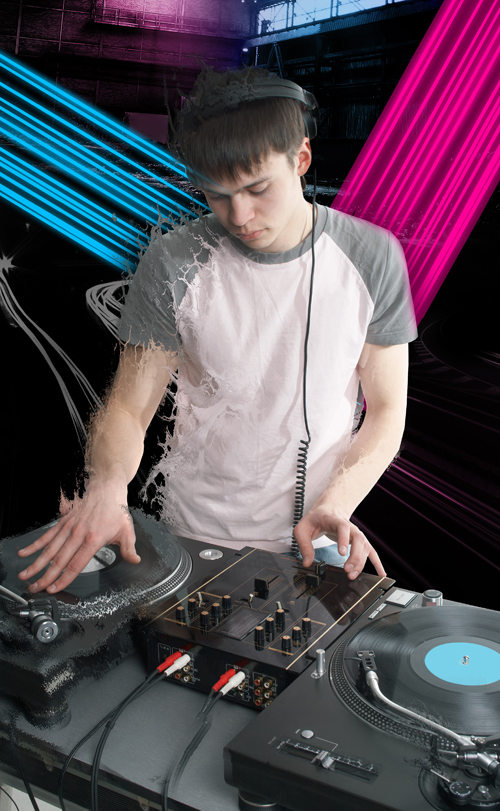
Select the duplicated extracted stock image(the one on top) and then duplicate it again now with the newly duplicated layer selected go to Filter>Distort>Displace now set the Horizontal and Vertical Scale to 100 and hit OK now select one of the Displacement Map Templates that you downloaded at the top. After the effect has been applied, erase the parts of the image that you don’t like. Repeat the process again just with another newly duplicated layer. Make use of a different displacement map though. I have this below.
Step 6
Let’s start adding some color to our piece. Create a new layer and fill it with Black #000000. Now set the blending mode of this layer to Linear Dodge and then select your brush tool with a fairly large size and start adding the different colors that you like, I used blue #00aeef | pink #ec008c | purple #43257e, but you can use any colors you want. This is what the canvas looks like without the blending mode set to Linear Dodge.

With the Blending Mode set to Linear Dodge
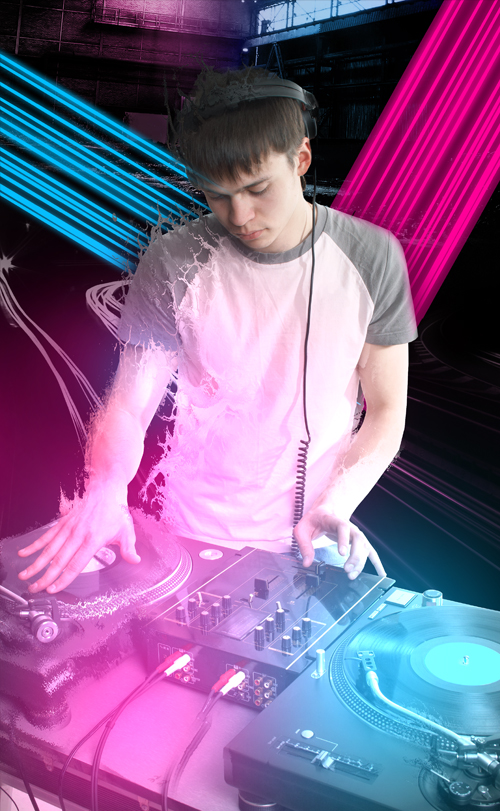
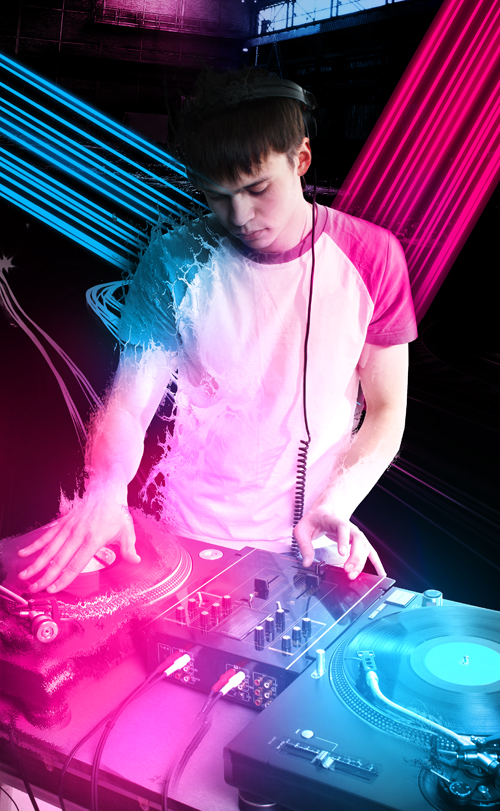
Now go to Layer>New Adjustment Layer>Brightness/Contrast – Now set the Brightness to -14 and the Contrast to +80 and hit Ok. Go back to the New Adjustment Layer>Levels – the levels values from left to right are 0 | 0.84 | 255 and hit OK. Now you should have something like this.

Step 7
Now let’s create a new layer and then grab our brush tool again. Select a moderate sized soft brush and start playing around with some colors, I used the same straight forward colors for this piece Blue #00aeef and Pink #ec008c and now I brushed wherever I thought color would be needed. Once I was done I changed my Blending Mode to Color.
Normal Blending Mode
Color Blending Mode
Step 8
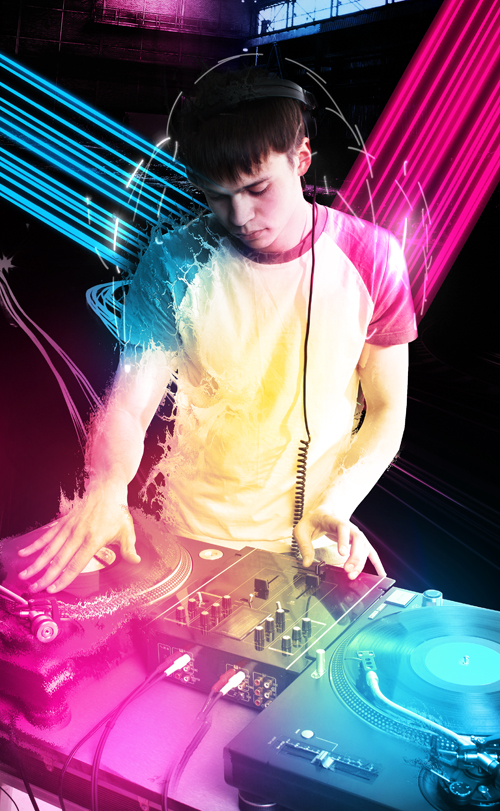
Go to Layer>New Adjustment Layer>Hue/Saturation – drop the saturation to -5 and hit OK. Now go to New Adjustment Layer>Brightness/Contrast – Brightness +18 and Contrast +11 hit OK. Now create a new layer and grab your brush tool. Now I used Yellow #fff053 and brushed in the middle of the piece on the dj’s shirt and then a bit of pink #ec008c on the right shoulder. I then changed the blending mode of the layer to Color to portrait the colors in the correct way.

Step 9
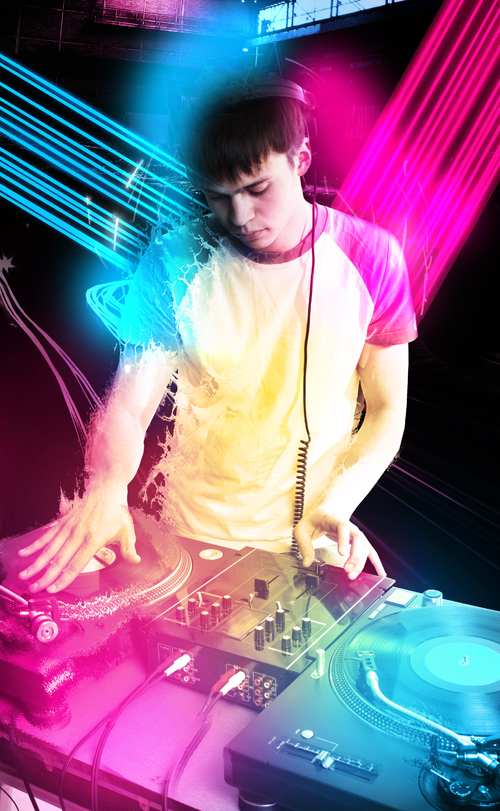
Now we will be adding a light streak to the image to add some motion to it. You should have downloaded the Light Streaks Pack by Barton Damer I used the IMG_0920 image from the pack and inserted it into the canvas. I then went to Edit>Free Transform and then clicked within the binding boxes and flipped it vertically and hit enter. I then desaturated the image by going to Image>Adjustments>Desaturate I then positioned it above the dj’s head and set the blending mode to Linear Dodge. I also erased the middle part of the image. This is what I have below.
Now I created a new layer above the light streaks layer and then right-clicked on it and selected Create Clipping Mask, I then selected my brush tool and brushed blue and pink over the light streaks and then set the blending mode to Color when I was done.
Normal Blending Mode
Color Blending Mode
Step 10
Now we are going to start with the finer details and some pen tooling. Firstly create a new layer and make sure your foreground color is set to white #FFFFFF. Select your brush tool and set the size to 12px and the hardness to 100%. Now select your pen tool. Create a curve on the vinyl’s with the pen tool. Something like this below. (I’m not going to explain how to use the pen tool in this tutorial as it is a intermediate tutorial.)

Now that you have created the curve and your brush tool is set right-click and select Stroke Path and make sure Simulate Pressure is checked hit OK. Now duplicate that layer on the vinyl and place it where you please. Once you are happy with it select the duplicated layers and merge them down and then set the layer Blending Mode to Overlay. Now duplicate the merged layer and flip it horizontally and place it on the other vinyl’s too.
Use the Pen Tool to create different forms and lines and shapes to compliment your composition. You can see the different lines and shapes I came up with below.
Step 11
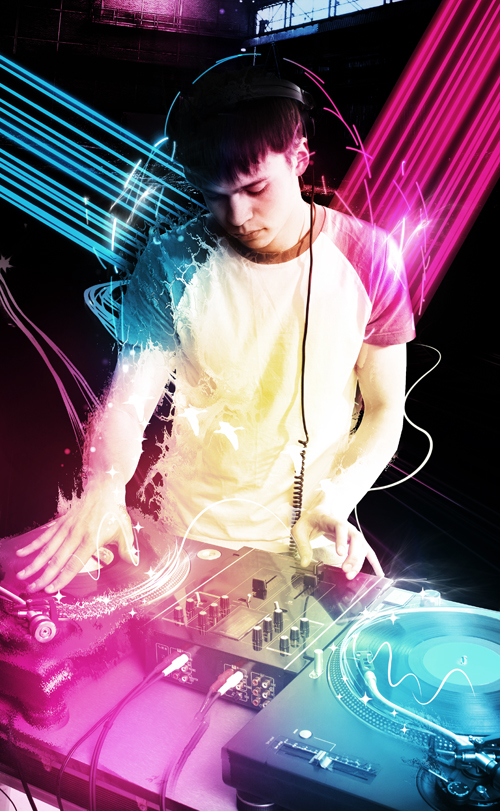
Now you are going to be using the Cosmic Light Brushes you downloaded earlier. Open the brushes in Photoshop and create a new layer now with white as your foreground make use of the brushes to add effects to your image. The brushes give a nice misty feel so make use of that. Now download some star brushes and then add them into your piece as well, just to give a nice sparkly feeling. This is what I have below.
Step 12
Create a new layer and use a soft brush to brush over the dj’s face with some yellow/pink/blue colors. To blend it well into the background of the composition. Now set the blending mode of the layer to Color. Now go to Layer>New Adjustment Layer>Hue/Saturation – Set the Saturation to -30 and hit OK. Now go to Layer>New Adjustment Layer>Brightness/Constrast – Brightness 0 and Contrast +18. Now go to Layer>New Adjustment Layer>Photo Filter and then choose Orange from the drop down menu and set the blending mode to Soft Light and the Opacity to 53% I have this below.
Step 13
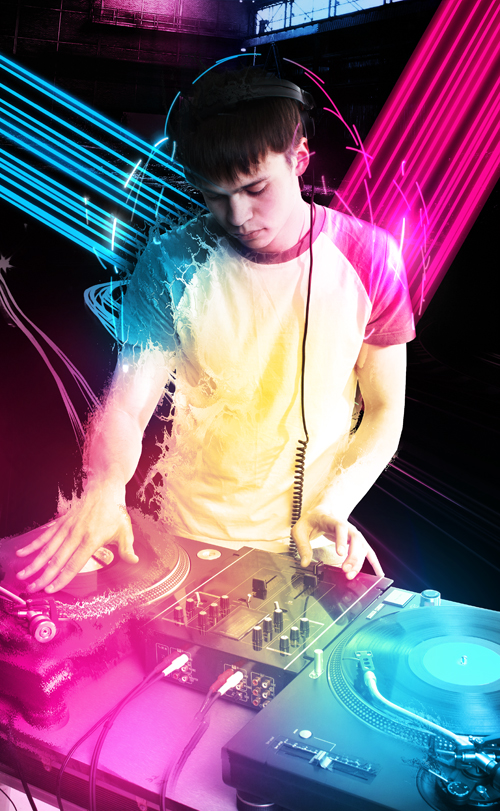
Create a new layer and with the new layer selected go to Image>Apply Image then go to Filter>Other>High Pass and use a radius of 10px now set the blending mode to Overlay and erase the parts you don’t like. Now go to Layer>New Adjustment Layer>Gradient Map and use a Blue to Pink Gradient and set the blending mode to Soft Light and the Opacity to 19%
Now go to Layer>New Adjustment Layer>Color Balance – set the Cyan to -26 | Magenta -31 and Yellow -28
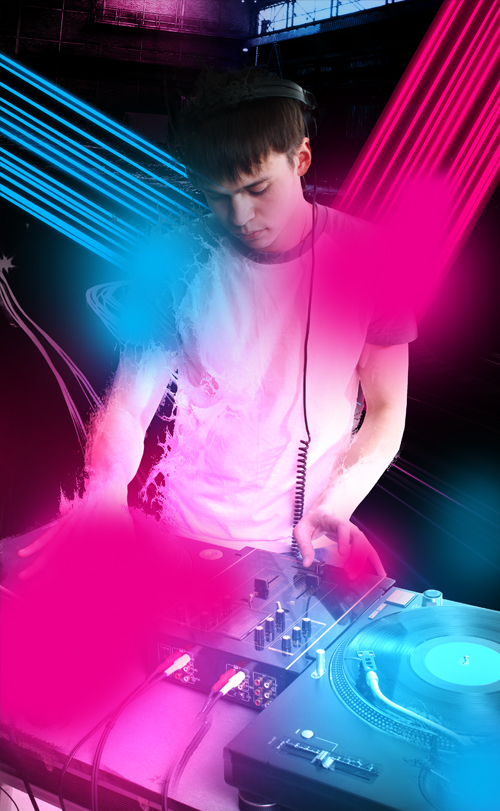
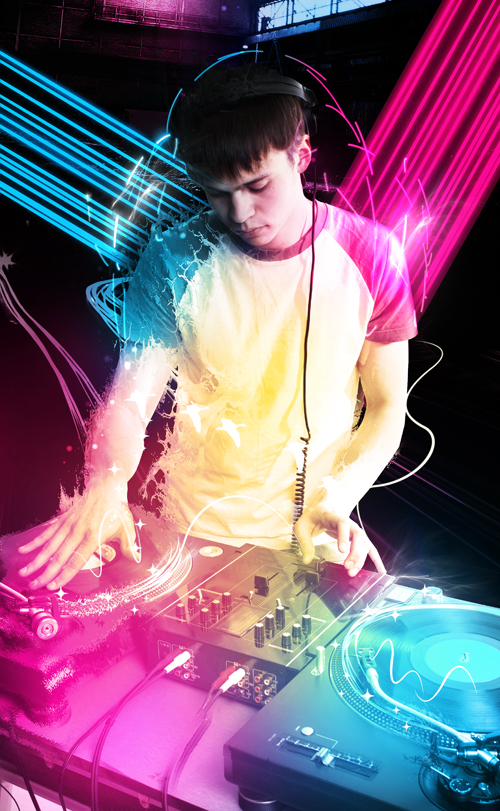
Last but not least go to Layer>New Adjustment Layer>Photo Filter and use a Violet color with a 55% density and press OK and set the opacity to 40% you are officially done. This is the final outcome below.

nice tut but the light streak pack download link expired would u mind if i ask if u can put up another
nice tutorial.. thx for sharing!
Great Tutorial, The electric effect is quite simple to realize and the result is impressive. 🙂
I featured it on Tutorialking.eu
This is a nice tutorial and I like the final effect!
I couldant make de step 4. Coul you put some more pictures in it to help me?
Thanks
Nice photoshop tutorial! I would really like to learn how to create wonderful images with the use of photoshop. I just don’t know how to start.
I like the final rendition … Great tutorial very easy to follow … thanks 🙂
it looks really good! especially the color combination!!!
I’m using Adobe Fireworks, and now try to learn to use photoshop too, your tutorial is clear and flawless results, even for beginners like me, thanks for sharing!
high class tutorial….. hebat….
nice tutorial ! amazing….thank you
I didn’t do the tutorial as I was familiar with most of it but thanks for the displacement map info. Is there a resource for downloading more of them? I have seen designs where it looks like they are breaking apart into paint and wondered how it was done. The stars brush on this was the only thing I wasn’t keen on. Thanks dude.
omg what a mind blower i ahve used photoshop for almost 5 years now and have never come across the displacemnt maps ive heard and seen about them thank you so much for this will save me alot of time on jobs now 😀
very nice tamks for all post
good !
this is a great tutorial for photoshop..
thx to media militia.
i like it..
sorry but i think there is something wrong on step 4 check it plz
Kya Bahut Qabil Ho Tum ? Tlk To Me Brother
sa ma kak in tutorialele voastre dak inteleg ceva…
Beautiful Boy!
hello. we have followed your tutorial and applied to some clients design. this can be seen in our portfolio now. thanks!
Luke
thank you it was really very helping
hot effect! i love it!
Nice tut 🙂
There is a lot of effects. Don’t know if i would use them all at the same time, but i just made a poster for a MMA event in denmark using one of your effects.
I didn’t have so much time to make it, but still check it out ! 🙂
http://sphotos-c.ak.fbcdn.net/hphotos-ak-ash3/555345_317270955056671_279441020_n.jpg
Thanks for the tutorial !
//M
Hello sir
i want this video tutorail plzzzzz tell me this if u have this tutorail in video.
Stylesight Hosts N.Y. Trend Event – A fashion mind I was recommended this web site by my cousin. I am not sure whether this post is written by him as no one else know such detailed about my difficulty. You are wonderful! Thanks! your article about Stylesight Hosts N.Y. Trend Event – A fashion mindBest Regards Cassetta
Photoshop is a magic. Nice work………
Wonderful post i think that it help me professional work. Thanks
I have learn a lot. You explain very clearly. Thank you so much for this tutorial.
I am always searching for quality posts & content and this is what I found
here, I hope you will be adding more..Thank you very much for your
informative and Educative post.