

I’m going to show you how to make a 3D text shatter effect. This effect is made in two programs, Cinema 4D and Photoshop.If you haven’t heard of Cinema 4D before it is a relatively easy to use 3d application, it is quite similar to 3dsMax or Maya. I will go pretty in depth with the Cinema 4D part, for all the inexperienced users, so bare with me if I go too slow. Now enough chit chat, let’s jump in.
Required Resources
In this tutorial we will be using some resources you will want to download before starting:
*NEW* – We just released a font that you can download that creates a similar effect. Check it out!
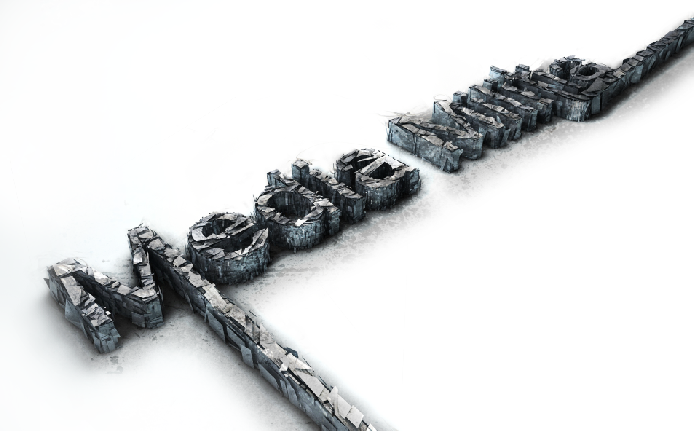
Final Image Preview
Step 1: Creating the basic text
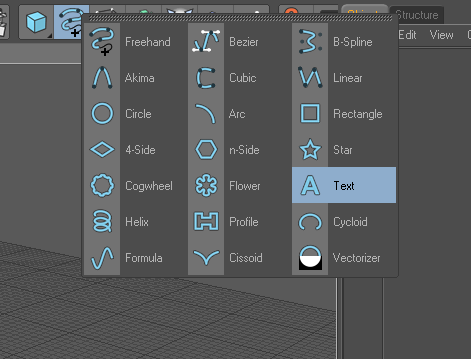
Open up Cinema 4D and make a text object
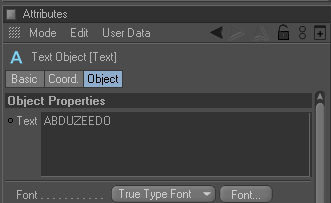
Write “Media Militia” in the text object
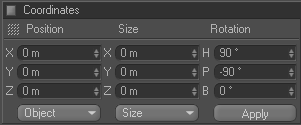
Now rotate your text object: 90* on the X axis and -90* on the Y axis
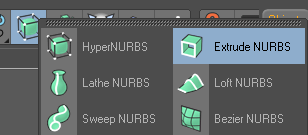
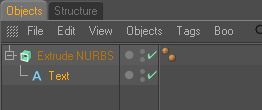
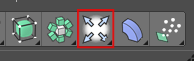
Create an Extrude NURBS object
And drop your text in it
Change the object properties of the Extrude NURBS to 0 / 0 / 35

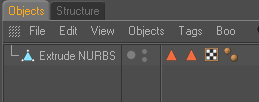
Now take your ExtrudeNURBS object and hit “C” (this makes your object editable)

Open this object and select everything (Ctrl+A) then right click your object and press “Connect”
You can now delete your old object that you just “Connected”
Rename your object “Media Militia”
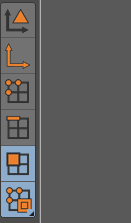
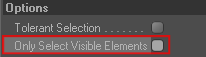
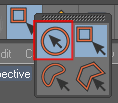
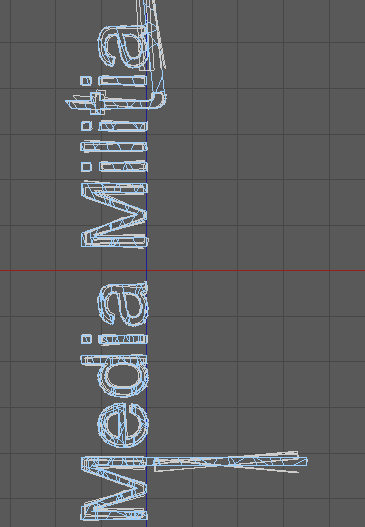
Take the polygon tool and the Rectangle Selection tool, make sure to un check the “only select visible elements” box

Now with the scroll button of your mouse click on your “canvas” and you will see that four different views just opened up, we will be using the top view

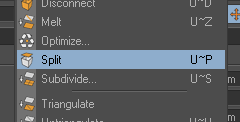
So middle click on the top view to make that view bigger, and select the first “M” letter of Media Militia right click on it and press “Split”
This creates a new object with just the “M” now delete the selection you have selected, this will delete the “M” from Media which leaves you with an “M” object and a “edia Milita” object. Rename the object you just split to “M”

Now go back to your “Media Militia” object and select and split the “t”, just as we did with the “M”. Delete the “t” from your Media Militia object and rename the “t” you just split to “t”

Middle click on your screen and go back to perspective view. Take the Live Selection tool and on your “M” object select the shown polygon:
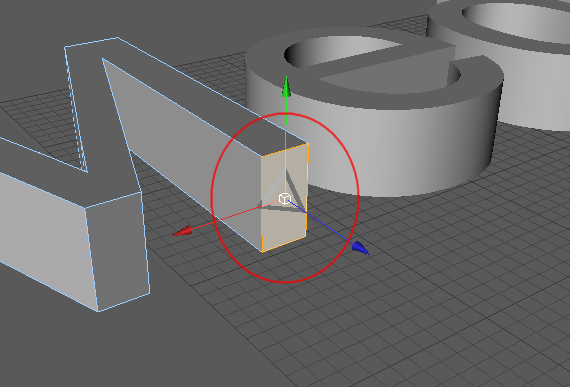
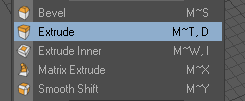
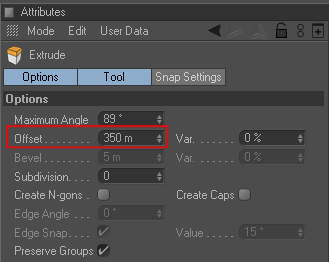
Right click on your screen and select “Extrude”
Add 350 to the offset
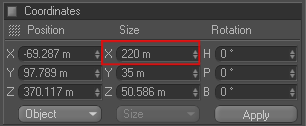
Go into Top View and select your “t” object, press Ctrl+A (to select all the polygons) then take your Scale Tool and scale up the X axis (or the red axis) to 220

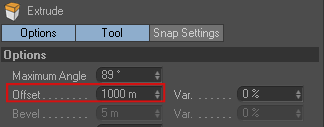
Go back to Perspective View and select the shown polygon with the Live Selection tool

Right click on your screen and select Extrude and add 1000 m in the Offset
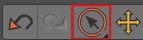
Take your Use Model tool and the Live Selection tool

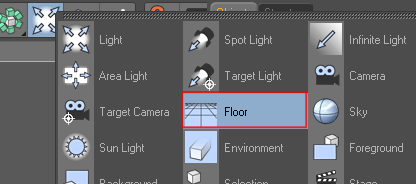
Make a floor
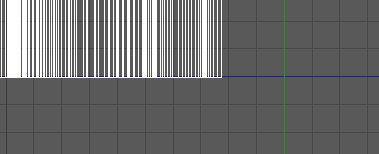
Go into Right View, select your three text objects and move them right on top of your floor
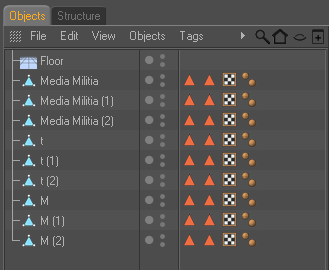
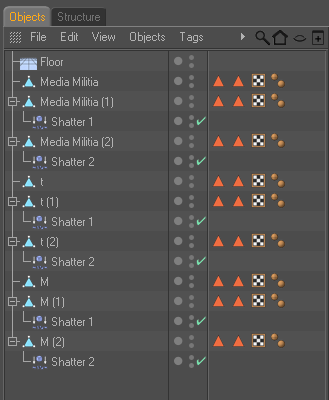
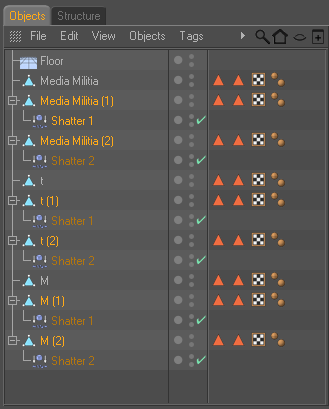
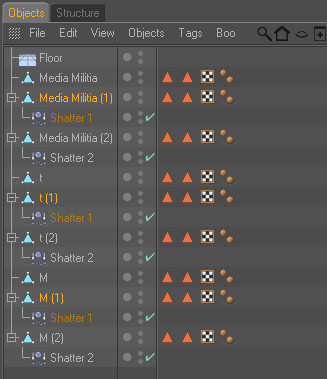
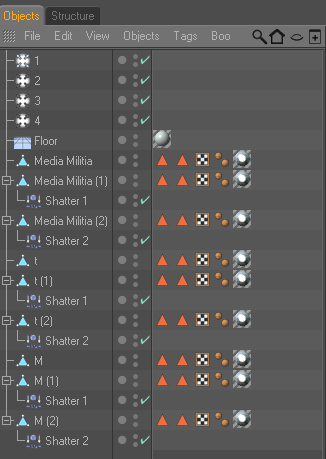
Now make two copies of each text object, and place each copy underneath it’s original, name each object as shown below
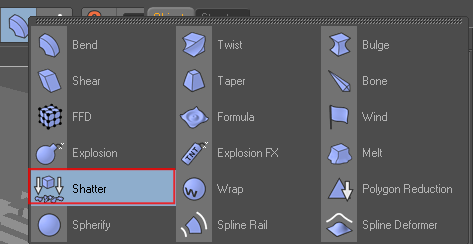
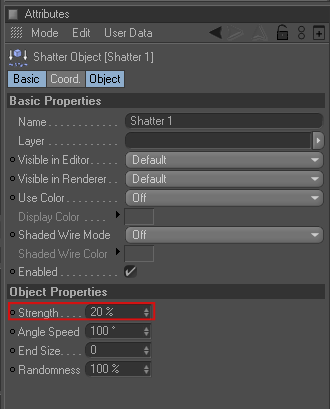
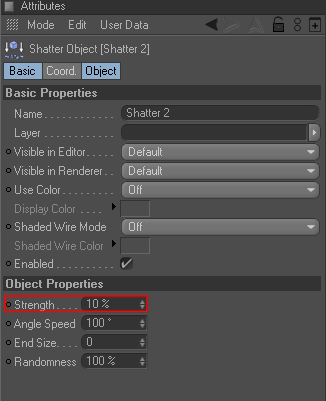
Create a Shatter Object and copy it, name one shatter object “Shatter 1” and the other one “Shatter 2”
Change the strength of the “Shatter 1” object to 20 %, and the strength of the “Shatter 2” object to 10%
Select both Shatter objects and copy them twice, now place a Shatter object in each copied text object (match them up according to their number as shown)
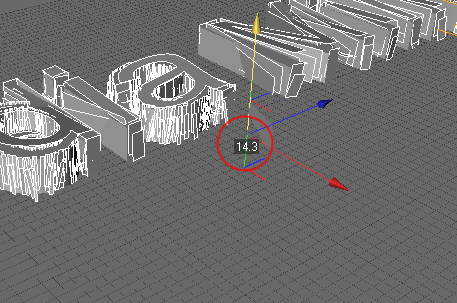
Now select all of your text objects ending with either a 1 or a 2 and take the Live Selection tool
And move the “green axis” up 14.3 points, so that it is on top of the original text object
Go into top view, take your Polygon tool and select all your text objects ending with “1”

Make sure you have no polygons selected (left click anywhere on your canvas to de-select any polygons you might have selected)
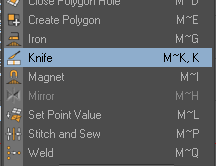
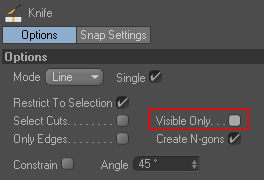
Right click on your canvas and select “Knife” (make sure the visible only is checked)

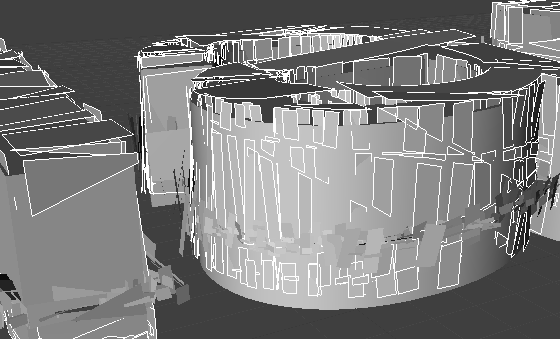
Now start randomly cutting from one side of your text to another, do this around 30-60 times (this will make the shattered pieces smaller)
Make sure you don’t leave any long polygons like the extruded M and T uncut

Keep cutting until you have something like this
Now do the same for the text objects ending with “2”
After that go into side view and start cutting up the text objects ending with 1 and 2 just as we did earlier (make sure to un check the “Visible Only” box)
Now select all your “2” text objects and scale up the green axis using the scale tool
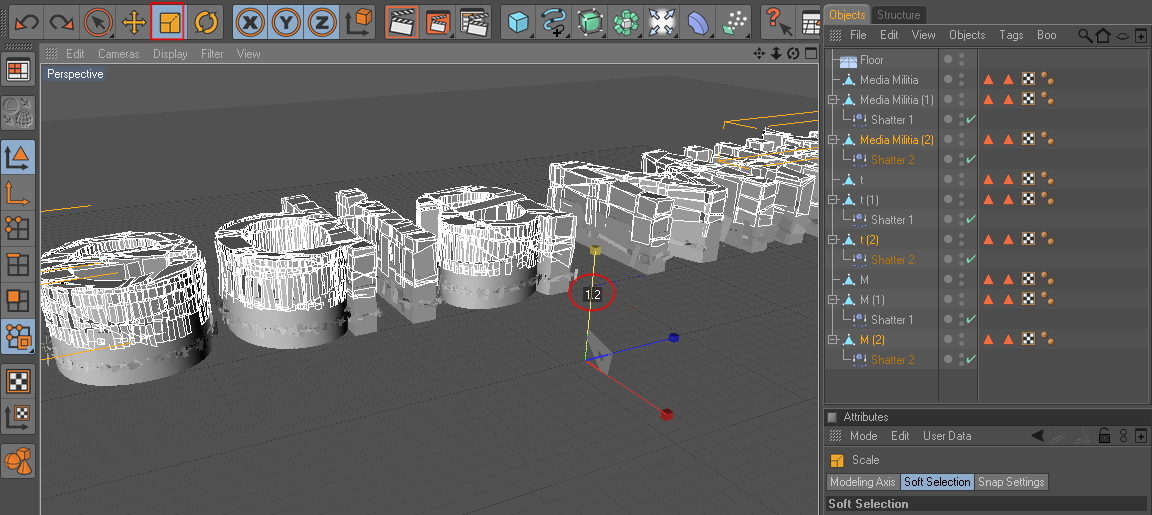
Then move it down, so that the top of the letters are slightly on top of your original text
Now take all the “1” text objects and scale them up as well

Then as we did before move them down, so that the top is a little higher then the original text
Step 2: Adding Light and textures to our image
Make a basic light
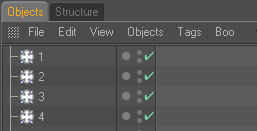
Make three copies of it, and name them 1, 2, 3, 4 accordingly
Change the Intensity of the first three light objects to 45% and change the intensity of the 4th light to 70%

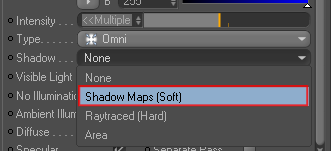
Now select the 2nd 3rd and 4th light objects and change the shadow to “Shadow Maps (Soft)”
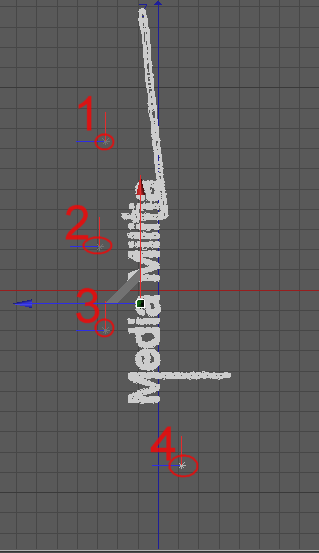
Now go into top view and move each light as shown below
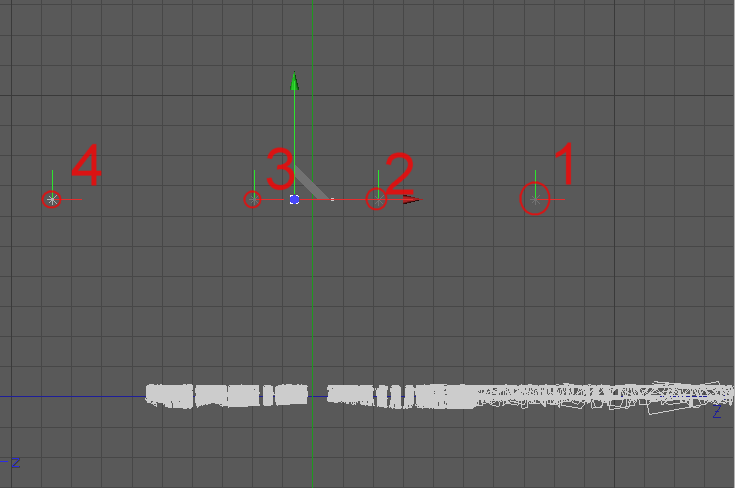
Go into side view, select all your lights and move them up a bit as shown
Now we are going to make the materials for our floor and for our text
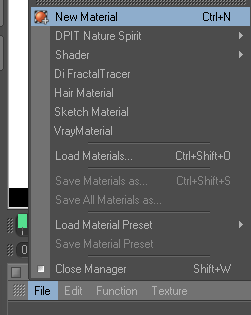
Start by making a new material
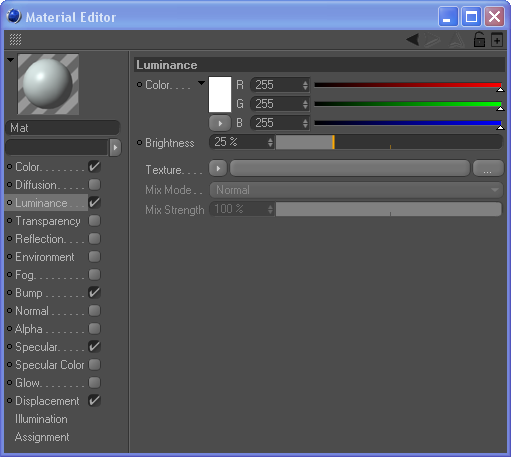
Double click on the material (to open the material editor) and change the color to the following

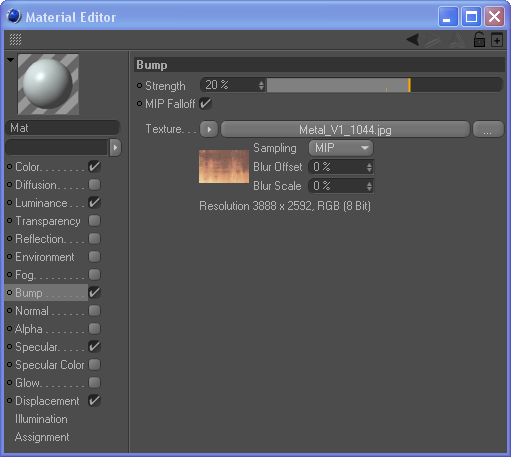
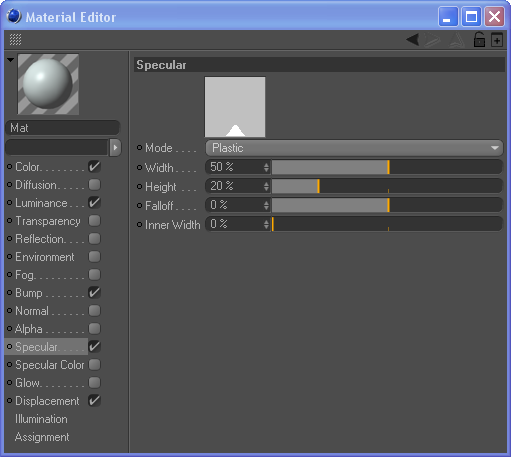
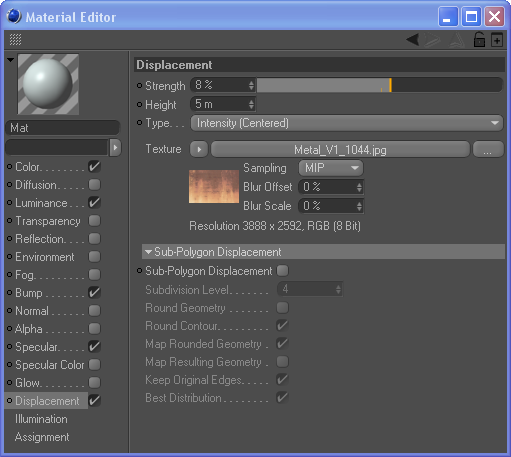
Now check the boxes for Luminance, Bump, Specular, and Displacement
Change the settings to the settings shown in the screen shots below (In the bump and displacement options you will have to load in the metal texture image)
Now close the material editor, and drop the material onto the floor

This next part isn’t necessary but it gives your text a nice touch, it does take longer to render though.
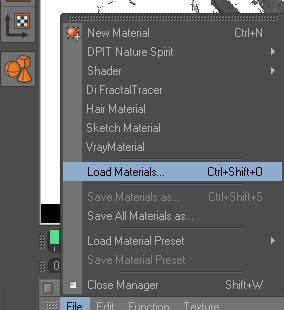
We are going to load our downloaded material and place it on all of our text objects
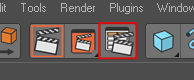
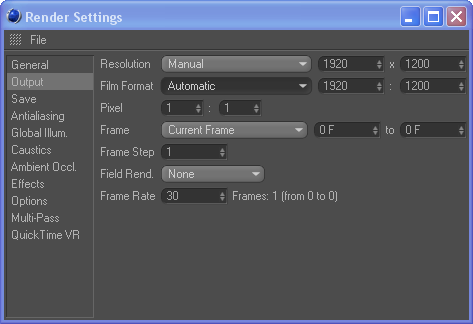
Go into the render settings, and change the Output to the following
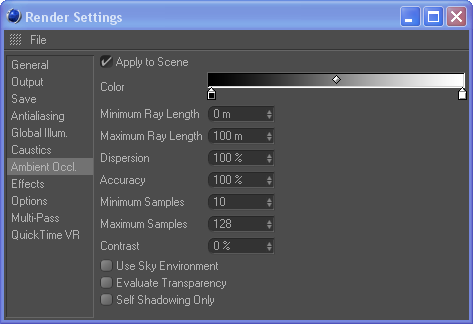
Then we are going to put on Global Illumination and Ambient Occlusion (just click the check box on the top, leave all the other settings on default)

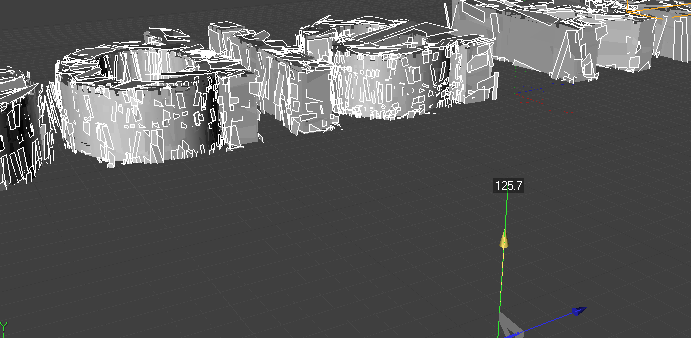
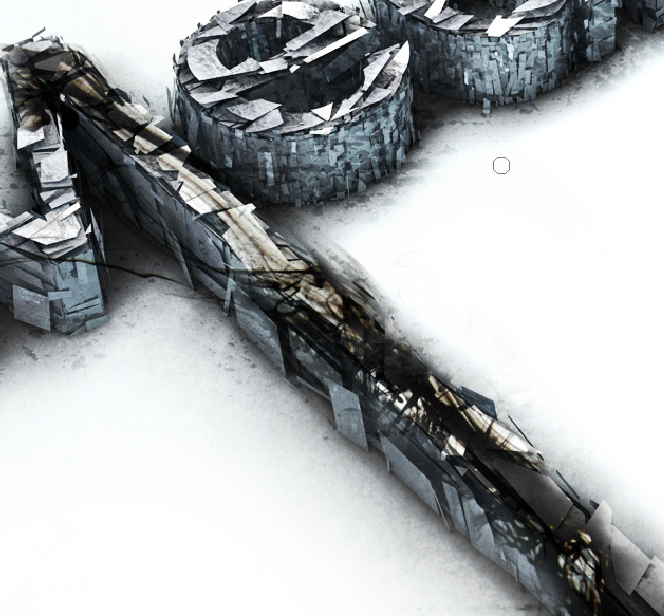
Before we render our scene we are going to set our perspective view on a nice angle, I put my picture on this angle
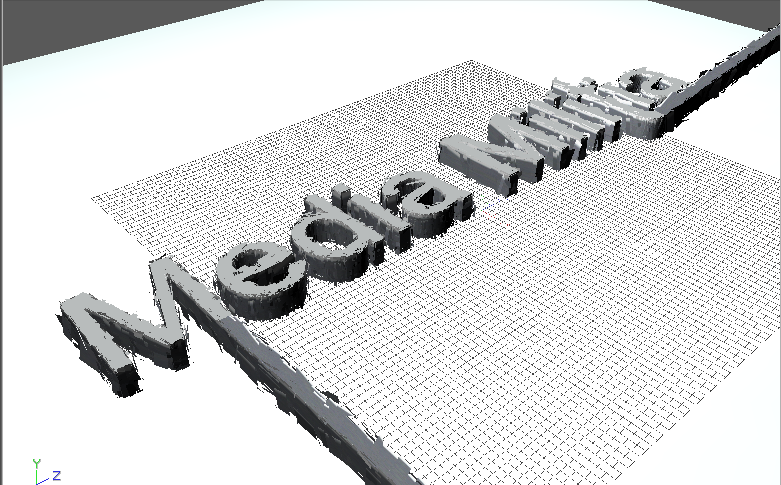
Now hit the render button

This can take quite a while, depending on how strong your computer is, but after that we are done with Cinema 4d and we will go play in photoshop 🙂
Once it is finished rendering save it as a jpg format, and 300 dpi (dots per inch)
Step 3: Editing the picture in photoshop
Open your image in photoshop
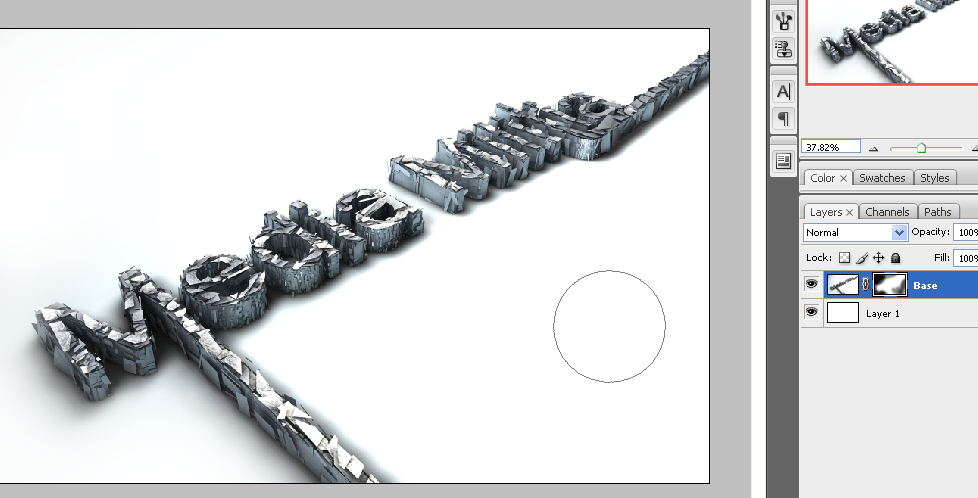
Double click your layer and name it “Base”
Make a new layer under your base layer and fill it with white
Now add a white mask to your “Base” and with a large soft black brush (bring the opacity of your brush down to 50%) start masking out the colored edges
Now import your metal texture and resize it so that I covers the entire media militia text, desaturate the texture and change the blending mode to overlay.
Take your eraser tool and delete any harsh exteriors
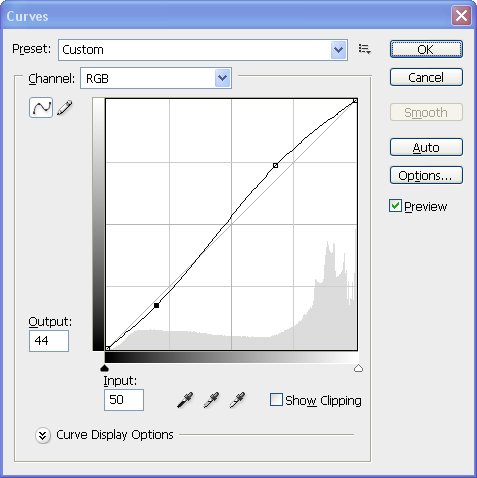
Take your base layer and go to Image>Adjustment>Curves and change the settings to something like the following
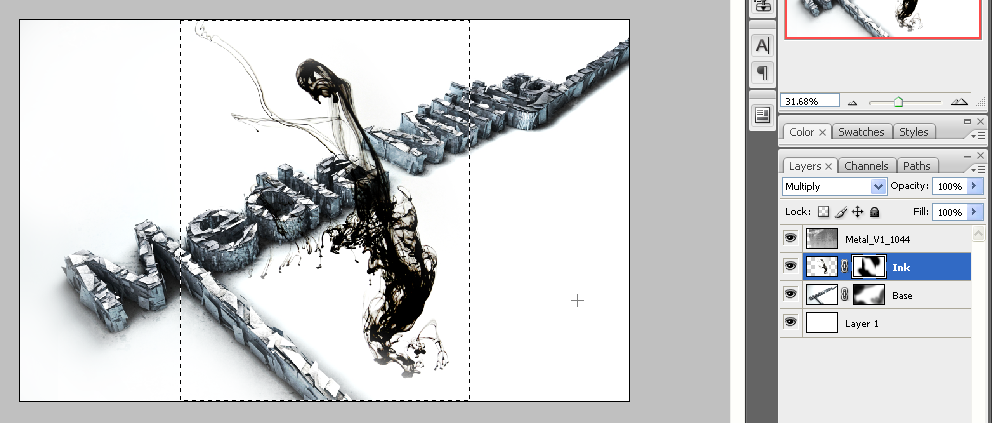
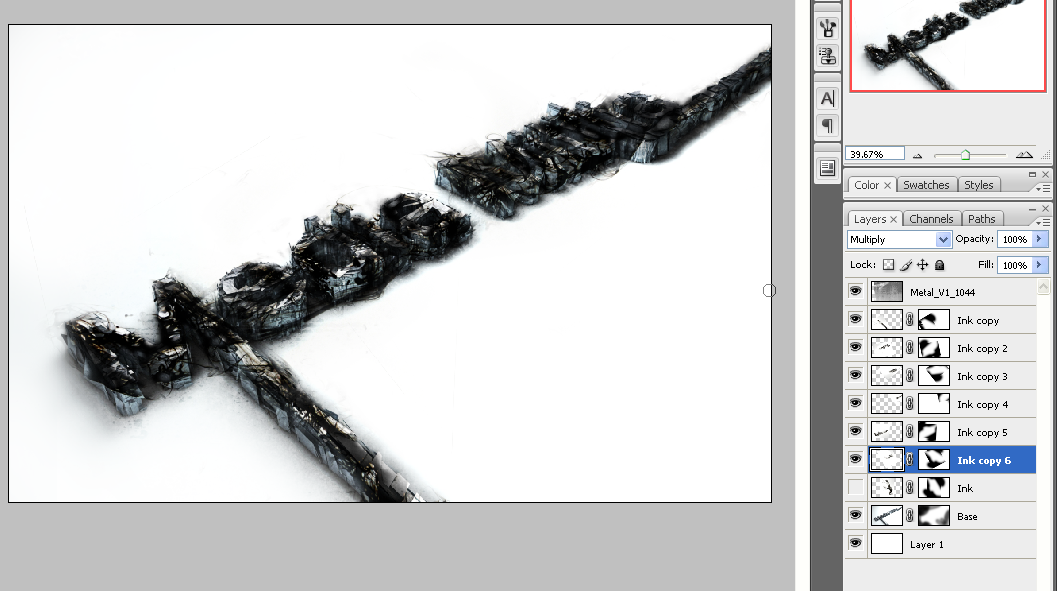
Now import your ink texture, rasterize it, and name it Ink. Make sure you place it underneath the metal texture
Change the blending mode to multiply
Add a mask to the layer and get rid of all the dark areas surrounding the actual ink
Now duplicate this layer and hide the original, rotate and move your copy so that it is on top of the text, then with a very soft brush mask out the parts that stick out from the text.
Then after that change the transparency to 5%-50% (change it around so that you get a random look) and with a small brush start brushing the edges of the ink that is on top of your text
Duplicate your original ink texture and cover another part of the text and repeat the same process as with the other ink texture. Do this until all your text is covered with ink textures.
Now select all your ink layers and add them to a group, name the group Ink.
Change the opacity of your ink group to 40%
Now make a new layer, name it Shadow, and with a black color and a soft, big brush add a line around the text as shown:
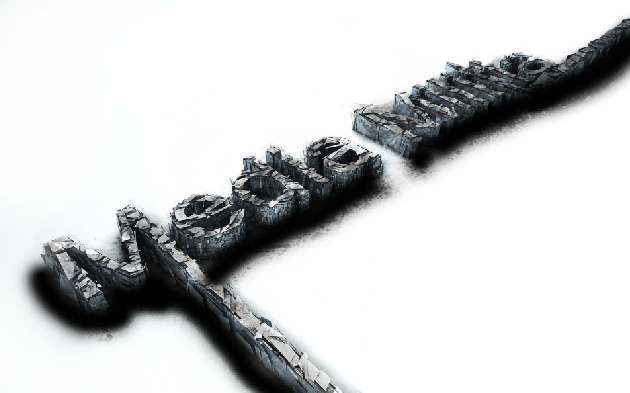
Add a Gaussian Blur, 17 px, and bring down the opacity to 30 percent. Now delete any parts of the shadow that you don’t like with a big soft brush
And we are pretty much finished.
Upload your finished product on your web hosting and see what it looks like online.
If you want to go even further you can take the dodge and burn tools and make some highlights on your Base layer
I hope this tutorial was of some help 🙂 Cheers!


@Arno: Thanks for the awesome tutorial. You killed it! Keep up the great work.
Awesome outcome!!! thanks for sharing!
brilliant!!
Very nice tutorial. Im beginner and i do it without problem.
There are no words… It is more tremendous… Thanks for a lesson
Anytime man 🙂
Very awesome tutorial! Thank u
WOOOH!!! ummm.this made my day!
Fantastic result. Very detailed and professional look.
Do you think there’s a way to accomplish this in Ps or Ai? I don’t have Cinema 4D, that’s the only reason I ask.
You might be able to create a similar effect in Ai but, sadly, that would be close to impossible. You might be able to achieve more of a 2d shatter effect 🙂 it’s all about experimenting
i started studying c4d about a year ago it has been a great experience
thanks man
text: adbuzeedo??
hmm…. XD
great tut!
Very nice, I wonder if I could try this in Blender, hmmm
Nice one!
I thought this was a Photoshop tutorial?
When I change the object properties of the Extrude NURBS to 0 / 0 / 35, it shifts the text but doesn’t extrude it. Any suggestions? I’m a complete noob to C4D so be gentle 🙂
try changing the settings to 35/0/0 or 0/35/0
You most likely didn’t rotate your object or something, therefore the axis on which you want to extrude your text changes 🙂 i hope this answers your question
@GriffinGotGun: I changed the properties to 0/35/0 and that worked for me…
But I’m also a complete noob on this. 😉
i have tried learning all the 3D softwares but i find C4D the easiest to learn and it doesn’t require so much resources on your pc.
Wow……..I just love good 3D designs. And you have a great text effect here. I was actually looking for something like this. Thanks for the tutorial.
Thanks man.
Great Resources.
This is great im just learning all this but this helps alot!
One of the best Cinema 4d Tuts around thanks
Any more 3D typography Tuts?
PLEASE KEEP THEM COMING!!!
Why does it say abduzeedo in the beginning? Did you steal the tutorial from them? I will investigate the matter. Good day.
@jhon: We ran a design contest with Abduzeedo. The 1st place winner of the contest, Arno wrote a tutorial for Media Militia on how to archive the effect.
This tutorial is exclusive to Media Militia and was never posted on Abduzeedo.
Arno’s winning design originally said abduzeedo, which is why that appears in the text area of the screenshot.
Here is a link to the contest: http://abduzeedo.com/wallpaper-contest-winners-announcement
This Great Arno…
Thanks….
Wow!! This is awesome…. Great tutorial, great outcome….. Just perfect!! Thanks for sharing!
great tuts! tnx a lot!
tremendous. envy you. 5star.
Very nice tutorial. Thank you soo very much!
wow what a nice tutorial i wish there was a maya tutorial on how to do this and i would to this for shure
Awesome text shatter effect used in this tutorial. Thanks for sharing this nice post.
I’m inspired! Great tutorial… Cinema 4D is such a pleasure to use… I’m a big fan too.
This is really awesome. in pakistan there is no know how of cinema 4d in graphic designing…. I had been searching for a comprehensive tutorial and here is the one…. GREAT WORK!
At last! a tutorial that any newbie (like me) can follow and still have outstanding results!
Wow. Great tutorial! I’ll learn Cinema 4D. Thanks a lot for making it.
vc tem este em portugues
Moderators Translation: “you have this in Portuguese?”
@binhocs: Não, nós não. desculpe.
Moderators Translation: “No, we do not. sorry”
I’m at the part where your adding in the lights and you made 4 copies of it and I’m stuck. I dragged on the lights on the top view like you showed but there is no side view…theres perspective, front, top, and right. Plus how are you moving the lights in that view? when I click and drag them they don’t move…this is frustrating
K what I did was clicked on each light in the objects window and just moved them like that…I think I did it and I figured the side vew = right view buuuut I previewed the render (it took over a hour) and I noticed like the top of my text looks like yours but the bottom but did not at all..I did in fact get confused when you were scaling your text and making them go slightly above the bottom one…that entire section confused me…you mind clarifying? I’m redoing the entire thing right now fixing kerning and whatnot and I’ll be reaching that part soon…thanks
Also your text seems to have more shadows and is darker…what would cause that since I followed your tut so far (havent gotten to the photoshop stuff yet)
is it possible to send you the file and you help me make it darker? I placed the lights just how you have it in your tut but you have more darker shadows than I do…
This is a really cool tutorial but why was it in a Photoshop Tutorials section? The use of Photoshop is minimal here. This is a 3D Tutorial.
can you reup the optional files for the text poliahing pls?
awesome work btw 🙂
@me2: Looks like c4d textures bandwidth limit has exceeded. Unfortunately, I don’t have the files from them anymore. Hopefully their site becomes available again, so I can grab them. If anyone else still has them, please share a link with us.
great tutorial, I am going to share it through my blog 🙂
Something is not right.
Im at the point where i have to do this;
Now take your ExtrudeNURBS object and hit “C” (this makes your object editable)
Open this object and select everything (Ctrl+A) then right click your object and press “Connect”
You can now delete your old object that you just “Connected”
The way the symbols look, triangle, triangle, scuare and 2 balls is not the way i end up!
Im getting square, balls, triangle triangle.
What the hell am i doing wrong.
Also i dont like the fact you didnt add picture with tekst added “you now should have something like this”.
Sorry but this is my first time with this programm and really want to follow your tut.
Thanx in advance.
Yep it doesn’t work anymore its an outdated tutorial and its not working with Cinema 4d 11.5 -.-
Damn man,
Im trying over and over again and i always end up with some type of like a negative of a photo when i render it 🙁
Pls help me out with this one dudes.
very very good.Like a dream.
@me2: The c4d texture site is back up. You should be able to download it from them now. I have also downloaded it again and stored it. If their site becomes unavailable again, I can provide anyone with a download link. Thanks!
i did EVERYTHING like you said, but something still went wrong.
how did you make the 3D ?
i might got it wrong somewhere, can you contact me ?
My MSN is viper71x@yahoo.com
And my Skype is iTheSystem .
Cheers 🙂
wow! this looks very very good! thanks!
16 year’s old? WOW!!!! awesome bro!
thanks for tutorial
WTF MAAAAN THAATSS AWESSOOOMEEEEE!!!! CONGRAAATULATIONS!!!
That website seems to be down again (the one with the extra materials. If anyone could provide a link to the materials, I’d be really grateful! Thanks very much!
@olly: That texture site was so good. I don’t get why they are having so many problems. Here is a temporary link until they get their site back in order: http://www.mediamilitia.info/shinyroughsteel.zip
Super cool. Thanks a lot!!!
Amazing design … Thank you very much on the idea
Thanks a lot!!!!!!!!!!!!!!!!!!!!!!! I am begginner & was really impressed by the outcome!!!!!! I was looking for such kind of effect it actually ignited the spark within me to learn 3D Great!!!!!!!!!!
That’s pretty nice stuff!
@jeyaone! Thanks very much for that! I only just noticed you had put it up! Nice one!
it’s awesome. it ROCKS!
Hey, awesome tut, thx alot
I seem to have problems with the global illumination though, when I render the scene with the default settings the picture turnes out sorta… negativish with red dots all over the pic… I use Cinema 4D R10, any advice?
awesome job! thx for sharing
This is great, but im having an issue where lorenzo is at… and i CANNOT SPLIT the letter… IT WILL not give me the choice and ive done exactly as this has all said, and its still grayed out. what the heck is wrong….
never mind… i just really suck… just ignore my comment :((( figured it out!!!! XD
AWESOME! i have the same age as you and i’m very interested in graphic deign and illustrations like yours!
excelente tutorial y buena integración
Gracias mil……gracias
un saludo desde BOLIVIA – SUD AMERICA
how do you add the light to the top layer? if i drag it on it… all it does is just make a text box… i cant figure it out! lol
nice effect!
and i’m amazed at your age! 🙂
You’re the man! You’re going placeses.
hola… de verdad gracias por el tutorial, estuvo muy bien
very nice tut! wow
hola Arno Van Waeyenberg eres un chico muy talentoso te felicito por la decision de ayudar a las personas que queremos conocer mas sobre el fantastico mundo del diseño.
Que Dios te bendiga y te guie simpre
Hi Arno Van Waeyenberge’re a very talented guy I welcome the decision to help people who want to know more about the fantastic world of design.
God bless you and guide you always
Trés bon travail !! est il possible de l’avoir en français?merci
很不错诶!!!
thanks for sharing this great tutorial
nice tutorial.. thanks
Thanks for the inspiration! I made this based on your tutorial :
thanks for sharing…..nice tutorial
Awesome !! thx for the tutorial
thank! it’s powerful!
It looks so cool this text effect! thanks for sharing!
I like your artwork. However, I am trying to follow your tutorial, and i think there may be an error in relation to the part where the text is dropped into Extrude. I believe that the text has to be dropped into Extrude BEFORE inserting the points 0,0,35. I tried doing it your away, and everything was just flat.
Please tell me if I’m wrong.
I much more like your job. Really it is so much creative. Thanks for sharing.
Very teachable method of 3D text shatter effect and the text is looking so gorgeous. Thanks for the posing.
Very good coverage, thanks for sharing the steps
One of the best laid out tutorial ever….my grandmother could follow this!
I have no words to say. This was awesome.
Thanks for sharing such brilliant tutorial.
i am familiar with 3Dmax,so……
Awesome !! thanks for the tutorial. thanks for sharing this great tutorial. it’s very powerful!
wow! ure skilled bro! thanx for the tut! REALLY helpful.
wow, this is great tutorial and very informative….
i hope it is easy to follow for everyone……
thanks for share……
Very good tut although I think you used the wrong text for an example.
The text is too long so the perspective makes it so the text cant be read. But a good one to follow.
This is a pregnant and tremendous post……
I think I am going to have to get hold of Cinema 4D.. this post is brilliant, thanks for sharing..!
Some things have to be changed (like extruding first, and only then rotating, because of something the C4D doesnt want to extrude it then), but everything else seems to work.
Cheers, nice tutorial, I got it right on the second try (not to mention, I did it in C4D demo version).
seems im having this problem. can you explain?
I read This post. Very nice post. Very useful for me. Thank you a lot. Please keep posting.
hy brother its amazing work in 3d & Photoshop . Very good coverage, thanks for sharing the steps. many more idias in photoshop to send my mail id.
hi!! how to install 3d soptware for free?…
uhhh…. this is supposed to be a photoshop tutorial like the title says on the previous page wtf??
Good job
done! very good!
very good
may i ask a question:
im stuck even in step 1 🙁 im so sorry im a beginner…
why after i changed the movement of z axis of the extrude nurb, the text is extruded but in a flat plane? (what I mean is, the extra geometry is created but it’s just flat…When I rotate the text object only, you will see it becomes 3D…seems the text object is limiting the extrude. Can you please help?
Yeah, this happens to me too. maybe there is another step to make it look 3d!
i found it, when selected extrude ,object settings > check Hierarchical